DIY Gifts: How to make Pyramid Building Blocks
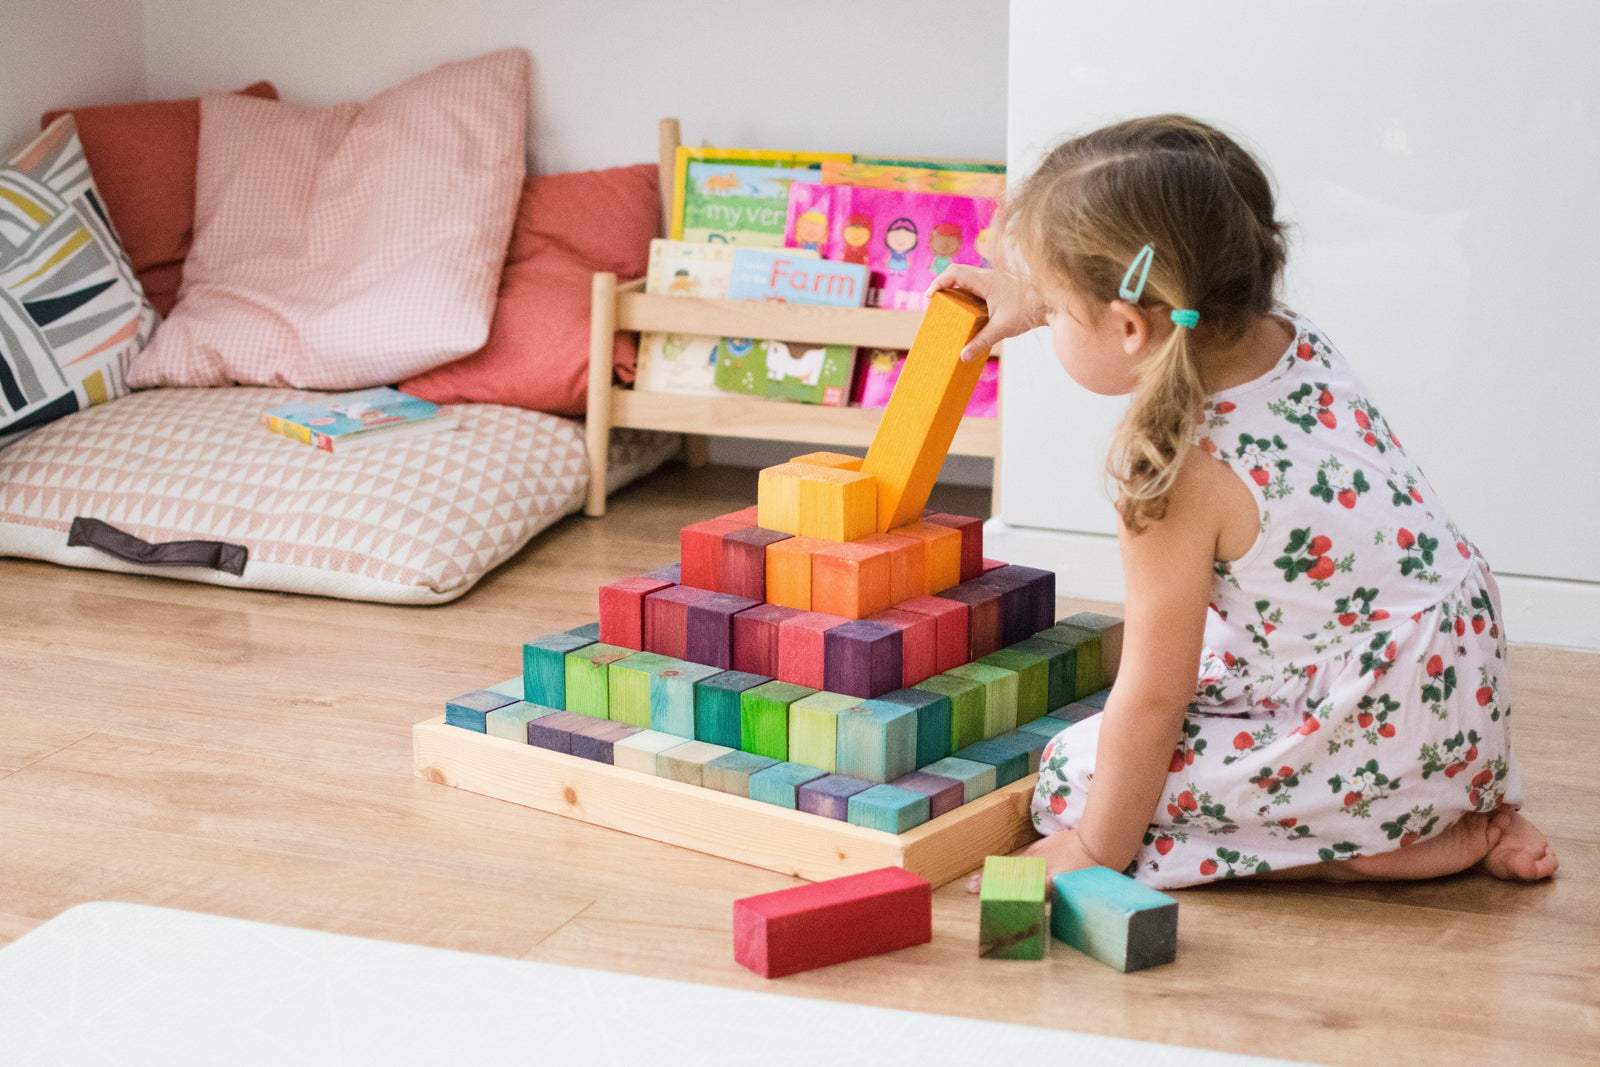
Building blocks are the ultimate open-ended toy. Construction, pretend play or small world creations there are literally hundreds of ways kids will find to incorporate blocks into their play. These pyramid building blocks are a perfect Birthday or Christmas gift and make an impressive addition to any playroom. Today I am sharing how you can make your very own using 2 x 2 wood & food colouring!
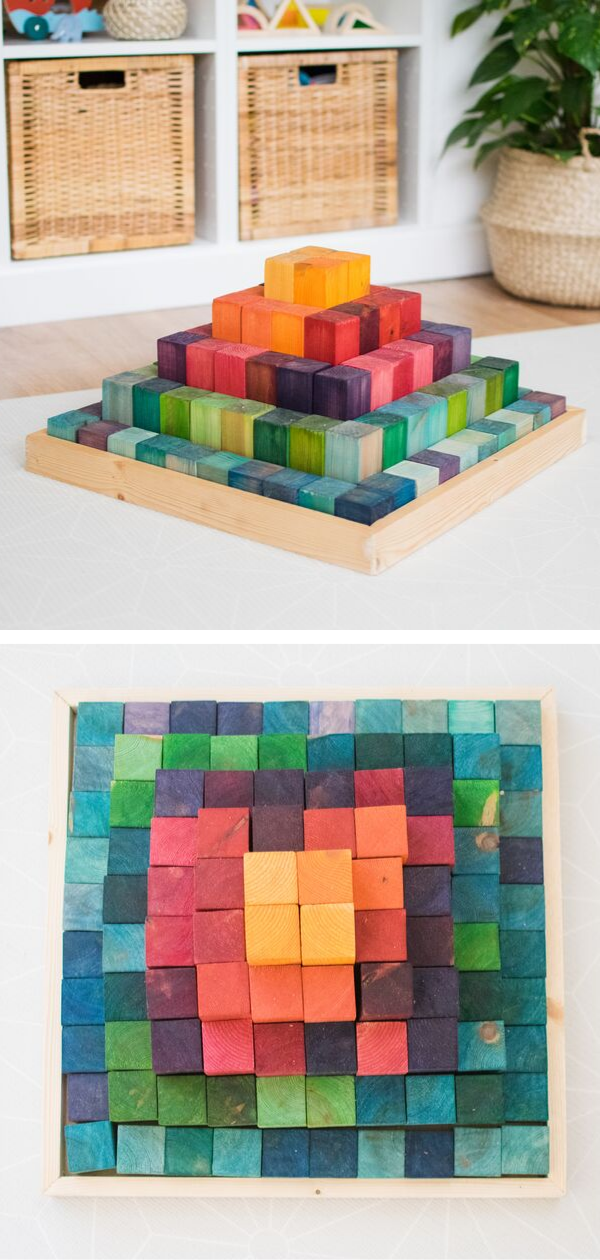
We made this building block pyramid for my youngest daughter for her first birthday back in March. My husband cut and sanded all the wood, I stained it and together we sealed every block. It was certainly a labour of love but I'm so glad we put the effort in as this toy gets so much use. At roughly £30 it also cost a fraction of what the real deal would!

This project was totally inspired by the Grimm's stepped pyramid. The Grimm's pyramid is the ultimate building block set and since making ours I have a fresh appreciation as to why it costs so much! It is beautifully made and the colours are amazing. But it is out of most people's budget and doesn't stay in stock for long!

So this our DIY version. It isn't perfect by any means but the girls don't notice the imperfections. They just love it! I've been asked a few times on Instagram if I could share how I made it so here it is!

What You Will Need
- 5 x 2.4m lengths of 2 x 2 Wood
- 18mm sheet of plywood (you'll need roughly 500x500mm)
- 1 x 2.4m length of 2 x 1 Wood
- Gel Food colouring
- Sander/ Sand paper
- Mitre-saw (could also use a hand-saw)
- Non-Toxic Sealant
I used Wilton Gel Food Colouring to stain our blocks. This worked surprisingly well. Do be aware though that it is a time consuming job to mix all the colours and shades! We went for a lot of different shades so you could simplify the job by just choosing a few.
Also, since making this I've discovered Tiny Land Play Stains which are amazing and I highly recommend them if your budget allows! The colours are so vibrant and they are all ready to go so it's just a question of painting it straight on or dip-dying them.
Sealing the blocks is a must if you are going to be using them with little children. Any exposure to water or saliva will transfer the colour easily. I used a non-toxic and vegan oil & wax product that I found on Amazon (link above). It worked very well at sealing the colour but it did leave a slightly sticky feel to the blocks. It's not a huge problem but it does mean you need to brush the blocks down occasionally when the dust and dirt sticks to them.
Since making our pyramid building blocks I now use Tiny Land Play toy safe sealant for my DIY toy projects which is very good and not sticky like this other one. You can browse the products on their website:
Cutting List
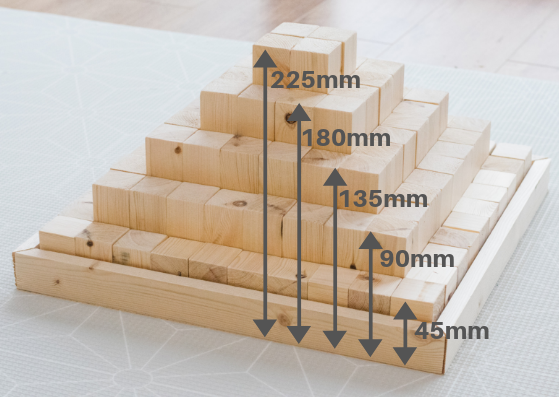
- 36 x 45mm blocks
- 28 x 90mm blocks
- 20 x 135mm blocks
- 12 x 180mm blocks
- 4 x 225mm blocks
- 1 plywood base & 4 x side pieces (work out exact sizing after making the blocks.)
Our 2x2 wood had a finished size of 45x45mm hence this is the height of the first row of square blocks. Check the finished size of your 2x2 and use this measurement to determine the height of the bottom row of square blocks. Then for each row add this height again to create a pyramid effect.
How to make Pyramid Building Blocks
1. Measure out your wood using the sizing advice above.
2. Sand the lengths of wood and use the cutting list to create all the blocks.

3. Sand the ends of the blocks and complete any further sanding to the sides so that the surface is completely smooth. It's worth taking your time over this to get them looking really good.
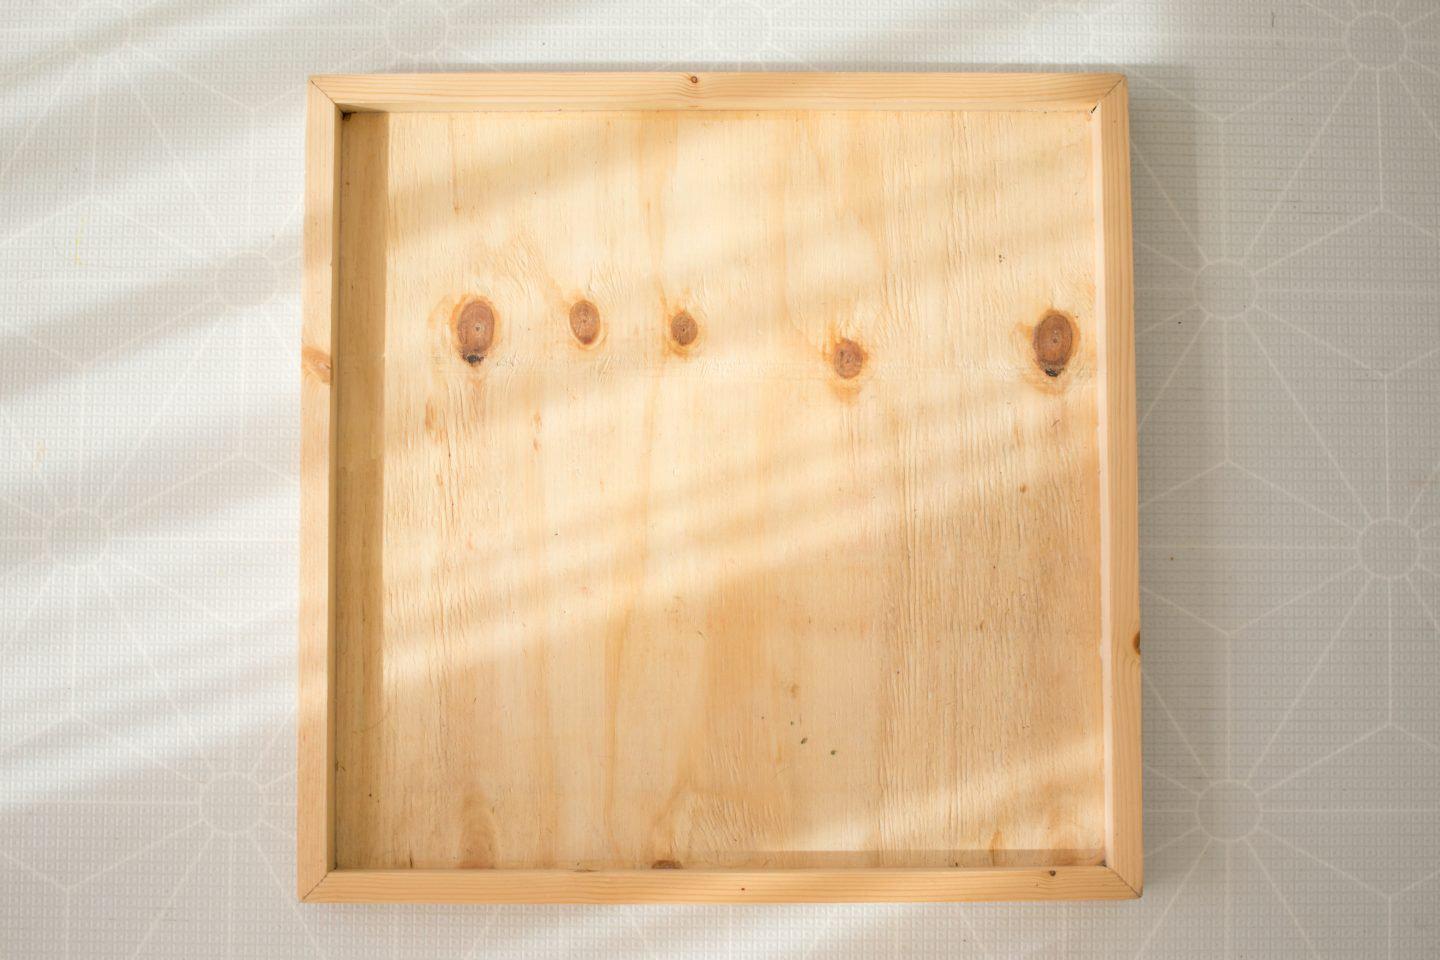
4. Arrange the blocks in a pyramid and measure the outside dimensions.

5. Measure around the outside of the stacked blocks (it should be a square!) and add 3mm onto each side measurement. This allows for a little wiggle room when stacking the blocks in the tray. Cut the square out of the plywood and sand.
6. Cut the 2x1 to frame the piece of plywood, mitring the corners.

7. Glue the frame together with wood glue, fill any holes with wood filler and sand.
Staining the Blocks
Before staining the blocks make a plan as to how many of each colour you would like. To get the various colours and shades using food colouring I either mixed two colours together in different quantities or increased the amount of food colouring added. Another method would be to give some blocks a second or third coat. I highly recommend using some of the left over 2 x 2 to test each colour first and make sure you are happy with it!
I painted each block individually but a quicker method could be to dip-dye them in bowls of food colouring, though you would need a fair amount of it to do this.

Sealing the Blocks
The sealant we used from Amazon was an oil & wax sealant so I used a cloth to apply it. The Tiny Land Play toy sealant is a liquid so needs to be painted on much the same as the food colouring. Both these sealants are non-toxic and plant based which is really important if a child is going to be using it and potentially mouthing it. Because of the natural properties of both these sealants it may take several coats to become completely waterproof.
Essentially this is a very easy project! It just takes some commitment to cut, sand, stain and seal 100 blocks. I think it's worth it though to have such a fantastic addition to our toy collection. Any questions? Pop them below and I'll get back to you.


